
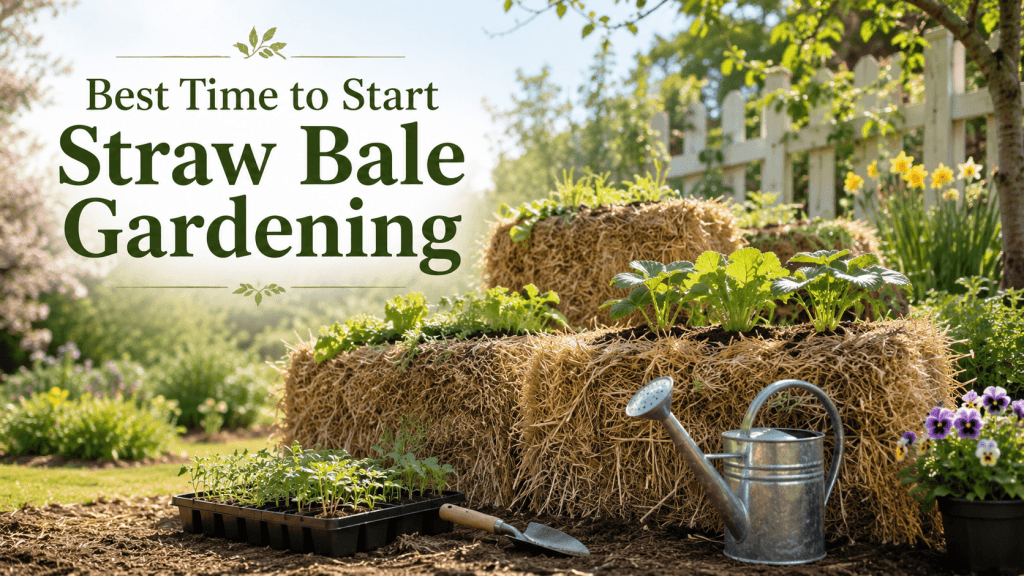
The best time to start straw bale gardening is before you are ready to plant.
That is the part many beginners miss.
A straw bale garden does not begin when the tomato seedlings go in. It begins when you choose the right spot, source your bales, condition them properly, and give the inside of each bale enough time to become plant-ready.
This early preparation matters because a fresh bale is not a finished growing bed. It needs water, nutrients, warmth, and microbial activity before roots can settle in well.
So, if you are asking when to start, the answer depends on your planting date.
Work backward from the day you want to plant. Then give yourself enough time to prepare the bales before that date arrives.
The Best Time to Start Straw Bale Gardening
The best time to start straw bale gardening is about two to three weeks before your target planting date.
Joel Karsten’s guide on how to start straw bale gardening recommends beginning the conditioning process approximately 20 days before your location’s average last frost date.
That timing gives the bale enough time to start changing inside.
During conditioning, the straw begins breaking down. The bale may warm. Moisture settles deeper into the material. Beneficial microbes become active. By the time planting day arrives, the bale should feel more like a prepared growing space than a dry block of straw.
Your exact start date depends on your climate.
In warmer areas, gardeners may begin earlier in the season. Colder regions often need more patience, especially when spring temperatures move slowly.
Instead of copying someone else’s date, use your local planting window.
Then prepare your bales before that window opens.
Start Planning One Month Before Planting
A month before planting is the best time to get organized.
You do not need to condition the bales yet, but you should start making decisions.
Choose where the bales will sit. Check how much sunlight the area gets. Make sure water is nearby. Decide how many bales you can manage without making the garden stressful.
This stage is also the right time to decide what kind of garden you want.
A one-bale garden works well for testing the method.
A four-bale garden gives a beginner enough room to grow more than one crop.
A twenty-bale setup fits larger backyard, school, homestead, or community garden plans.
Do not buy products before making this decision. Your bale count controls what you need next.
Buy Straw Bales Early
Straw bales should usually come from a local source.
They are bulky, so buying them nearby often makes more sense than shipping them. Local buying also lets you inspect each bale before bringing it home.
Look for bales that feel firm, dry, and tightly tied.
Avoid bales that already look soaked, loose, or badly broken down. They will soften during the season, but they should not fall apart before you begin.
Straw is usually better than hay because hay can contain more seeds. Those seeds may sprout and create extra work.
Once you buy the bales, place them where they will stay. Wet bales become heavy, and moving them after conditioning starts can turn into a problem.
Choose the Right BaleBuster Product
After you know your bale count, choose the BaleBuster product that matches your setup.
This is where many first-time gardeners make mistakes. They buy too little product and try to stretch it across too many bales. Others buy more than they need because they have not planned the garden size.
Keep it simple.
For one bale, BaleBuster1 is the one-bale organic option listed on the shop.
For a small starter garden, BaleBuster4 is made for four average-size bales.
For a larger setup, BaleBuster20 fits twenty-bale gardens.
The right product should match the number of bales you plan to condition.
That one rule makes buying much easier.
What to Buy Now for a One-Bale Garden
A one-bale setup is best for someone who wants to test straw bale gardening.
It keeps the first season simple. You can learn how conditioning works, how the bale changes, and how often you need to water without managing a bigger layout.
For this setup, buy:
- One straw bale from a local source
- BaleBuster1
- Watering can or hose
- Gloves
- Hand trowel
- Seeds or seedlings closer to planting time
Do not buy seedlings too early. Wait until the bale is close to ready.
A one-bale garden can help you build confidence before expanding next season.
What to Buy Now for a Four-Bale Starter Garden
Four bales make a practical first garden.
You get more growing room than a single bale, but the setup still stays manageable. This size works well for gardeners who want to grow a mix of vegetables, herbs, or flowers.
A simple four-bale setup should include:
- Four local straw bales
- BaleBuster4
- Hose or watering can
- Gloves
- Hand trowel
- Plant labels
- Stakes or cages, if growing tomatoes or climbing crops
New gardeners who want product and instruction together can choose the BaleBuster4 Starter Kit. It includes BaleBuster4 and Straw Bale Gardens Complete, which helps explain the method in more detail.
This option works well when you want fewer questions during your first season.
What to Buy Now for a Larger Garden
A larger straw bale garden needs more planning.
Twenty bales require space, water access, walking paths, and a stronger layout. You also need enough conditioning product for the full setup.
For this type of garden, buy:
- Twenty local straw bales
- BaleBuster20
- A reliable hose or watering system
- Gloves and basic hand tools
- Stakes, cages, or trellises
- Plant labels
- A guide or book if the setup is new to you
Large gardens can produce more, but they also punish poor planning faster.
Before buying twenty bales, confirm that water can reach each one easily. Also, leave enough room to walk between rows. Crowded bales may look efficient at first, but they become harder to manage after plants grow.
Start Conditioning Before Planting Week
Conditioning should not wait until planting week.
The bale needs time to prepare before seedlings go in. When the process starts, water and nutrients support microbial activity inside the straw. As microbes work, the bale begins to break down and becomes more useful for roots.
Cold weather can slow this process.
The Straw Bale Gardens article on bales not getting hot explains that bales may be planted after 12 days of conditioning when temperatures stay over 45°F. It also notes that organic treatment may take 18 days.
Use those timelines as guidance, not as a blind rule.
Your bale should feel moist inside. The straw should begin to soften. Some warmth may appear during conditioning, though extreme heat is not always necessary.
When the bale shows several signs of readiness, planting becomes safer.
Do Not Buy Seedlings Too Early
Seedlings should be one of the last things you buy.
Many gardeners get excited when garden centers open and bring home plants before the bales are ready. That can create stress. Seedlings may sit too long in small containers while the bales are still conditioning.
Buy in the right order.
First, choose the garden location.
Next, buy the bales.
After that, order the correct BaleBuster product.
Then condition the bales.
Seedlings should come when planting time is close.
Seeds can wait longer, but live plants need better timing.
Buy Learning Support If You Are New
Some gardeners can follow product instructions and move forward comfortably.
Others want a full guide before they start.
If this is your first season, learning support can save money and frustration. The Straw Bale Gardening booklet by Joel Karsten is a helpful starting point for understanding the method before you set up your garden.
A guide can help answer common beginner questions.
When should conditioning start?
How wet should the bale be?
What happens if the bale does not get hot?
When should seedlings go in?
What should I do after planting?
Product helps prepare the bale. Good instruction helps you use the product correctly.
Best Buying Timeline
Here is a simple timeline for first-time gardeners.
Four Weeks Before Planting
Choose your garden location. Decide how many bales you want. Check sunlight and water access. Read the method if you are new.
Three Weeks Before Planting
Buy your straw bales locally. Order the BaleBuster product that matches your bale count. Gather basic tools.
Two Weeks Before Planting
Place the bales and begin conditioning. Follow the product instructions carefully. Keep water nearby and stay consistent.
One Week Before Planting
Check bale moisture, warmth, and softness. Watch the weather. Prepare plant supports if needed.
Planting Week
Buy seedlings if the bales are ready. Plant when the bale has completed conditioning and the weather suits your crops.
This timeline keeps the process calm.
It also helps you avoid rushed decisions.
What Not to Buy Right Away
A smart setup does not require everything in the garden aisle.
First-time gardeners should avoid buying too much before they understand the garden size.
You probably do not need heavy tools, expensive raised bed materials, oversized trellises, or random fertilizer products.
Focus on what the method actually needs:
- Good bales
- Correct BaleBuster product
- Water access
- Sunlight
- Basic tools
- Seeds or seedlings at the right time
- Guidance if needed
Buying less can work better when every item has a clear purpose.
Best Product Choice by Garden Size
Use this quick guide before ordering.
For one bale, choose BaleBuster1.
Four bales, choose BaleBuster4.
For four bales plus the full guide, choose the BaleBuster4 Starter Kit.
For twenty bales, choose BaleBuster20.
For basic learning before setup, start with the Straw Bale Gardening booklet by Joel Karsten.
The best purchase depends on your bale count, not on guesswork.
Common Timing Mistakes
Starting Too Late
A bale needs time to condition. Starting the week you want to plant can rush the process.
Buying Seedlings First
Seedlings should wait until the bales are close to ready.
Ignoring Cold Weather
Cool conditions can slow microbial activity. Add extra time when spring temperatures stay low.
Placing Bales Too Far From Water
Watering becomes harder as the season gets warmer and plants grow larger.
Choosing the Wrong Product Size
Always match BaleBuster to the number of bales you plan to condition.
FAQ: Best Time to Start Straw Bale Gardening
What is the best time to start straw bale gardening?
Start about two to three weeks before your target planting date. Many gardeners begin conditioning around 20 days before their average last frost date.
Should I buy seedlings before conditioning?
No. Buy seedlings when the bales are close to ready. This keeps plants from sitting too long in small containers.
What should I buy first?
Buy straw bales first, then choose the right BaleBuster product for your bale count.
Can I start with one bale?
Yes. A one-bale setup works well for testing the method before expanding.
Which BaleBuster product should beginners buy?
BaleBuster4 is a strong beginner option for a small starter garden. The BaleBuster4 Starter Kit adds the book for extra guidance.
Final Thoughts
The best time to start straw bale gardening is before planting day.
Give the bales time to condition. Choose your garden size early. Buy the correct BaleBuster product. Keep water close. Wait to buy seedlings until the bales are nearly ready.
A strong season starts with preparation.
One bale can teach you the method.
Four bales can give you a real beginner garden.
Twenty bales can support a larger growing plan.
No matter the size, the best results come from starting early, buying with purpose, and planting only when the bales are ready.