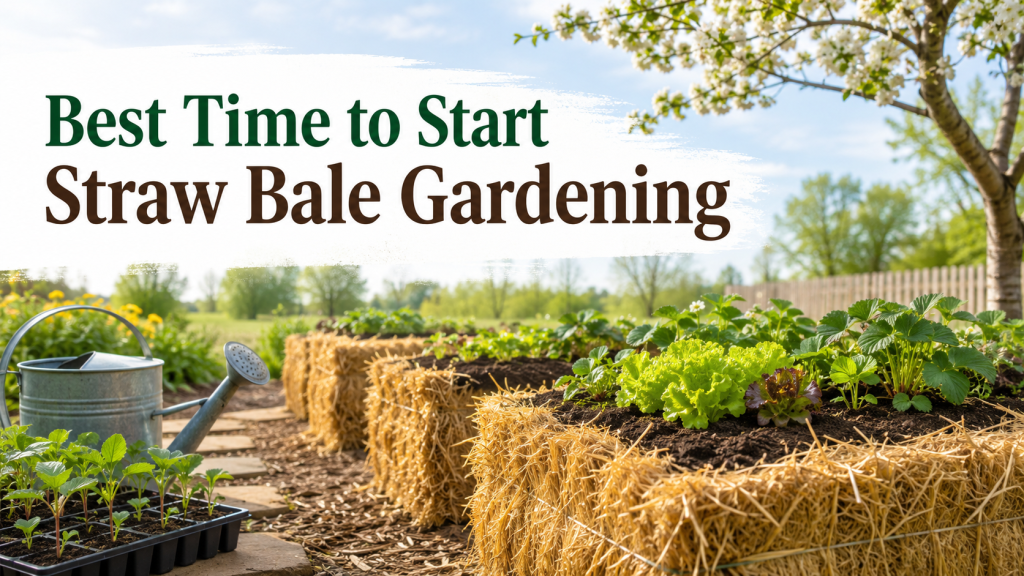
Most gardeners start thinking about straw bale gardening when the weather begins to warm up.
That is understandable. The sun comes out, garden centers start filling up, and the idea of growing tomatoes, peppers, cucumbers, herbs, or flowers suddenly feels exciting again.
But with straw bale gardening, the best time to begin is not the day you want to plant.
The best time to begin is a few weeks before planting.
This is because a straw bale needs time to be prepared before it becomes a good place for plants to grow. On the Straw Bale Gardens education site, Joel Karsten explains that once the straw inside the bale begins to decay, it becomes conditioned compost that creates an excellent plant rooting environment. He also notes that getting the bales conditioned is an essential part of the process and should begin two weeks before the target planting date wherever the gardener is located. (Straw Bale Gardens)
So if you are asking, “When should I start straw bale gardening?” the better question is:
When do you want to plant?
Once you know that, you can work backward and prepare the bales at the right time.
The Short Answer
The best time to start straw bale gardening is about two to three weeks before you want to plant.
If you are planning around spring planting, the Straw Bale Gardens guide recommends beginning the conditioning process approximately 20 days before your location’s average last frost date. The same guide explains that this may fall between March and May depending on your location. (Straw Bale Gardens)
That means you do not need to wait until your garden is ready for seedlings before buying supplies.
In fact, waiting too long can make the process feel rushed.
A better plan is:
- Buy your bales first.
- Choose the right BaleBuster product based on your bale count.
- Place the bales where they will stay.
- Start conditioning before planting day.
- Plant only after the bales are ready.
This gives the bales time to begin changing on the inside before your plants go in.
Why Straw Bale Gardening Starts Before Planting Day
A straw bale may look like a ready-made garden bed, but a fresh bale is not ready for planting immediately.
At the beginning, it is still mostly dry straw.
The magic of the method happens when the inside of the bale starts decomposing. That process is called conditioning. Water and nutrients are added to the bale, bacteria become active inside it, and the straw begins to break down.
This is why timing matters.
If you plant too early, the bale may not yet be ready to support your plants well. If you wait until planting week to buy supplies, you may not give the bales enough time to condition properly.
A good straw bale garden begins with preparation.
Not panic buying. not guessing and not planting into an untreated bale.
Preparation is the difference between a garden that starts strong and one that struggles from the beginning.
A Simple Seasonal Timeline
Instead of thinking about straw bale gardening as one single task, it helps to think of it in stages.
Four Weeks Before Planting
This is the planning stage.
Decide where the garden will go. Choose how many bales you want to use. Check your water source. Think about what you want to grow.
This is also a good time to order learning materials if you are new to the method. The Straw Bale Gardening booklet by Joel Karsten is one of the brand’s entry-level learning resources and is useful if you want a quick guide before setting up your first garden. (Strawbale Garden Shop)
Three Weeks Before Planting
This is the buying stage.
Buy or source your straw bales locally, then choose the BaleBuster product that matches your garden size.
At this point, you should already know whether you are preparing one bale, four bales, twenty bales, or another combination.
Two Weeks Before Planting
This is the conditioning stage.
The Straw Bale Gardens homepage says conditioning should begin two weeks before the target planting date. (Straw Bale Gardens)
This is when you begin preparing the bales with water and the right conditioning product.
Planting Week
This is when you check whether the bales are ready.
If the bales have completed the conditioning period and the weather is right for your crops, you can plant.
This is the point where seedlings, seeds, and simple planting tools matter most.
What to Buy First
The first thing to buy is not the seedlings.
It is the bale.
Then the conditioning product.
Seedlings come later.
This order matters because seedlings are living plants. If you buy them too early and the bales are not ready, you may end up holding plants longer than planned. They can become stressed, root-bound, or weak before planting.
A better order is:
- Straw bales
- BaleBuster product
- Learning guide, if needed
- Watering tools
- Seeds or seedlings closer to planting time
This keeps the process cleaner and prevents wasted money.
Buy Straw Bales Locally
Straw bales are usually best bought locally.
They are bulky, and local buying allows you to inspect them before bringing them home. You can check whether they are dry, firm, and tied securely.
Look for straw bales from:
- Farms
- Feed stores
- Farm supply stores
- Garden centers
- Local agricultural suppliers
The most important thing is to avoid confusing straw with hay. Straw is typically preferred for this method because hay may contain more seeds, which can create weed problems.
Before buying, decide how much room you have. One bale is enough to test the method. Four bales create a more useful starter garden. Twenty bales are better for larger growing plans.
Your bale count will determine what to buy next.
Choose BaleBuster Based on the Number of Bales
This is where many people make the buying decision too complicated.
The easiest way to choose is by bale count.
If you are conditioning one bale, choose BaleBuster1, which the shop describes as a 100% organic bale conditioning formula packaged in the right quantity for preparing one bale. The product page also notes that the gardener provides the bale of straw or hay and water, and that the bales should be positioned in a sunny location. (Strawbale Garden Shop)
If you are preparing a small starter garden, BaleBuster4 is made for conditioning four average-size 36” x 18” x 16” bales of straw, hay, or similar bales for growing vegetables, herbs, or flowers. (Strawbale Garden Shop)
If you are planning a larger setup, BaleBuster20 is listed as a twenty-bale box with a traditional NPK formulation. The product page says it contains fungi and live bacteria, including Trichoderma Ressie, Bacillus subtilis, and Bacillus megaterium, and that the formulation uses traditional nitrogen sources from refined products to feed microbes. (Strawbale Garden Shop)
That is the cleanest buying rule:
One bale, BaleBuster1.
Four bales, BaleBuster4.
Twenty bales, BaleBuster20.
What to Buy If You Are Starting Small
If this is your first season, start with a setup you can manage.
A one-bale setup is useful if you want to test the method before committing to more space. It lets you learn how the bale behaves, how watering feels, and how plants grow in a conditioned bale.
For that kind of setup, BaleBuster1 is the simplest fit because it is packaged for one bale. (Strawbale Garden Shop)
A four-bale setup is better if you want a real beginner garden. Four bales give you more room to grow different plants without creating a large project. That is where BaleBuster4 becomes the stronger choice. (Strawbale Garden Shop)
A small starter garden might include:
- Four straw bales
- BaleBuster4
- A garden hose or watering can
- Gloves
- A hand trowel
- Seeds or seedlings
- A guidebook if you want step-by-step instruction
That is enough to begin without overbuying.
What to Buy If You Want More Guidance
Some people are comfortable reading a product label and figuring things out as they go.
Others want more support.
If you are completely new to the method, buying learning material can save frustration. The BaleBuster4 Starter Kit includes the four-bale BaleBuster product and Joel’s Straw Bale Gardens Complete book. The product page states that the BaleBuster4 formula contains traditional nitrogen sources from refined products, a proprietary blend of urea, muriate of potash, and di-ammonium phosphate, plus fungi and live bacteria. (Strawbale Garden Shop)
This kind of bundle works well for beginners because it combines the product with the method.
That matters.
A conditioning product helps prepare the bale, but the book helps the gardener understand what to do before and after that stage.
For a first-time customer, the starter kit is often a better buying experience than buying supplies separately.
What to Buy If You Are Going Large
Large straw bale gardens need more planning.
If you are preparing twenty bales, do not try to stretch a smaller product across the whole setup. That can make the conditioning uneven.
For larger gardens, BaleBuster20 is the product built for that scale. The product page describes it as a twenty-bale box and explains that its fungi and bacteria are decomposers that work in synergy with plant roots. (Strawbale Garden Shop)
This option makes sense for:
- Large backyard gardens
- School gardens
- Community gardens
- Homestead-style growing
- Returning gardeners preparing many bales
A larger setup also needs stronger water access. If you are conditioning twenty bales, a watering can will quickly become tiring. A hose or organized watering setup makes more sense.
What Not to Buy Too Early
There are a few things you should not rush to buy.
Do not buy seedlings before your bales are close to ready. Seedlings are better purchased when you know planting is near.
Do not buy too many extra tools before your first season. Straw bale gardening does not require heavy equipment.
Do not buy a large conditioning product unless your bale count matches it.
Do not buy random fertilizers if your goal is to follow the Straw Bale Gardens method. The education site states that BaleBuster is specifically designed and formulated for Straw Bale Gardens. (Straw Bale Gardens)
The best early purchases are the items that prepare the garden foundation.
Bales.
BaleBuster.
Water access.
Learning support.
Everything else can follow.
Timing Changes If the Weather Is Cold
Weather affects conditioning.
Warm weather helps bacteria grow more quickly inside the bale. Cold weather slows the process.
On the Straw Bale Gardens site, Joel explains that when air temperature is cooler, bacteria will not grow as quickly. He also says gardeners can plan to plant after conditioning the bales for 12 days when the temperature is over 45°F, but if there are colder days, they should add a few more days to the conditioning period. For organic treatment, the site mentions 18 days. (Straw Bale Gardens)
This is why the best time to start is not a fixed date for everyone.
The right time depends on your local weather.
If it is still cold, start earlier and give the bales extra time.
If the weather is warm, conditioning may move faster.
What to Buy Now by Garden Type
Here is a more practical breakdown.
If you are just testing the method
Buy one straw bale and BaleBuster1. Add a watering can, gloves, and one or two seedlings closer to planting time.
If you want a proper beginner garden
Buy four straw bales and BaleBuster4. Add simple tools and a water source. If you want more guidance, choose the BaleBuster4 Starter Kit.
If you are preparing a large garden
Buy the number of straw bales you need locally, then match the bale count with BaleBuster20 or a combination of product sizes if your bale count is not exactly twenty.
If you are still learning
Start with the Straw Bale Gardening booklet by Joel Karsten or choose a starter kit that includes the book and conditioning product.
A Simple Buying Calendar
Here is a cleaner way to plan the season.
One Month Before Planting
Decide your garden size. Read the method. Choose where the bales will go. Check your water source.
Three Weeks Before Planting
Buy straw bales locally. Order BaleBuster based on your bale count. Get a guide or starter kit if you need instruction.
Two Weeks Before Planting
Position the bales and begin conditioning.
One Week Before Planting
Watch the weather. Check your seedlings. Make sure your tools are ready.
Planting Week
Plant only when the bales are conditioned and the weather is suitable for what you are growing.
This buying calendar prevents rushed decisions and makes the whole process easier.
Common Timing Mistakes
The most common mistake is waiting until planting day to think about conditioning.
Another mistake is buying seedlings before the bales are ready.
A third mistake is choosing the wrong BaleBuster size because the gardener did not count the bales first.
A fourth mistake is expecting every garden to follow the same exact timeline. Weather matters. Cold slows the process. Warmth speeds it up.
The best approach is to use the recommended timing as your guide, then adjust based on your local conditions.
Final Recommendation
Start straw bale gardening before planting day.
If you want a simple rule, begin preparing about two to three weeks before your target planting date. If you are planning around spring frost, begin about 20 days before your average last frost date, as recommended in the Straw Bale Gardens starting guide. (Straw Bale Gardens)
Buy your bales locally.
Choose BaleBuster based on the number of bales you want to condition.
Use BaleBuster1 for one bale.
You use BaleBuster4 for four bales.
Use BaleBuster20 for twenty bales.
If you are new, consider the BaleBuster4 Starter Kit or one of Joel’s guides so you understand the full method before planting.
The best time to start is when you still have enough time to prepare.
That is what gives your straw bale garden the strongest beginning.