Straw bale gardening is designed to make growing vegetables, herbs, and flowers easier.
You do not need to dig up soil, or need to build expensive raised beds. You also do not need a complicated setup before you can start growing.
But you do need the right basic tools.
The good news is that the list is simple. Most of what you need is focused on preparing the bale, watering it properly, planting correctly, and learning the method before you begin.
On the Straw Bale Gardens education site, Joel Karsten explains that straw bale gardening is a different type of container gardening. The straw bale itself becomes the container, and once the straw inside begins to decay, it becomes “conditioned” compost that creates a strong rooting environment for plants. The site also notes that conditioning should begin about two weeks before the target planting date.
That means your tools should support one main goal:
Prepare the bale properly before planting.
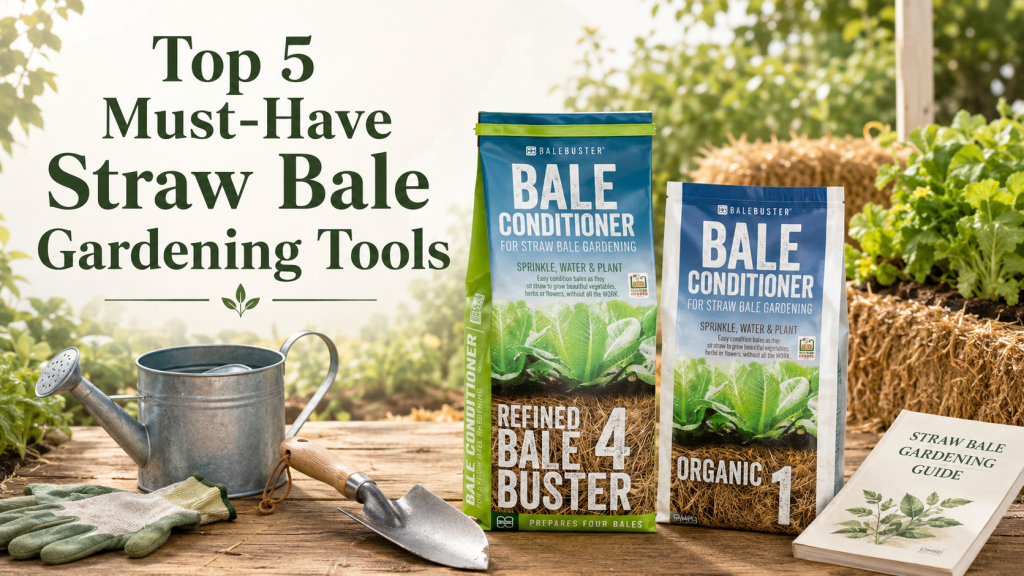
Here are the top five must-have straw bale gardening tools and resources to help you start with more confidence.
1. Straw Bales
The first tool is also the foundation of the entire method: the bale itself.
In straw bale gardening, the bale acts like the growing container. It holds the plant roots, retains moisture, and becomes the growing medium as it breaks down internally.
The Straw Bale Gardens site explains that the outside crust of the bale serves as the container, while the inside becomes conditioned and ready for planting as it decomposes.
For beginners, this is what makes the method attractive. You can grow without preparing traditional garden soil. The education site describes the method as a way to grow a garden anywhere, including patios, driveways, rooftops, and poor soil areas.
When choosing bales, focus on placement first.
Your bales should be positioned where they can receive enough sunlight and where watering will be easy. The method depends on keeping the bale moist during conditioning and throughout the growing season.
A small setup may only need one bale. A beginner-friendly garden may use four bales. A larger garden may require twenty or more bales.
The number of bales you choose will also determine which conditioning product makes the most sense.
2. BaleBuster Conditioning Product
If there is one product that matters most in straw bale gardening, it is the conditioning product.
Conditioning is the step that prepares the bale for planting. Without it, the straw remains dry, compact material. With proper conditioning, microbial activity begins inside the bale and the straw starts breaking down into a warm, moist, nutrient-rich rooting environment.
The Straw Bale Gardens site explains that the step-by-step process of conditioning creates an extraordinarily productive rooting environment for young seedlings.
BaleBuster is the brand’s conditioning product created specifically for this process. On the About page, Joel Karsten is described as the pioneer of the STRAW BALE GARDENS method and the BALEBUSTER conditioning formula. The same page states that BALEBUSTER contains an all-in-one formulation designed specifically to help accelerate decomposition of the bale.
This matters because beginners often struggle with questions like:
How much fertilizer should I use?
When should I apply it?
How long should I wait before planting?
How do I know the bale is ready?
A conditioning product helps simplify that process.
The right BaleBuster option depends on your bale count:
BaleBuster1 is best if you are conditioning one bale.
BaleBuster4 is best if you are preparing a small starter garden with four bales.
BaleBuster20 is best if you are preparing a larger garden with twenty bales.
For most beginners, BaleBuster4 is a practical starting point because four bales give enough space to grow a useful small garden without becoming too large to manage.
3. Watering Can or Garden Hose
Water is not optional in straw bale gardening.
It is part of the method.
During conditioning, water helps carry nutrients into the bale and supports the microbial activity that begins breaking down the straw. After planting, water keeps the growing environment moist enough for healthy root development.
The Straw Bale Gardens homepage describes the method in three simple steps: position the bale, condition it, then plant and grow. During conditioning, the site says fertilizer and water are applied to kickstart internal decomposition and heat generation.
That is why a watering can or garden hose is one of the most important tools.
For one or two bales, a watering can may be enough.
For four or more bales, a garden hose is usually more convenient.
The most important thing is consistency. If the bale dries out too often during conditioning, the process slows down. If the bale is overwatered, it can become too wet and less balanced internally.
The goal is to keep the bale moist enough to support decomposition, not soaked to the point that water is constantly pooling around it.
For small gardens, place the bales close enough to a water source that watering does not become a daily frustration. A good location can make the entire season easier.
4. Hand Trowel and Garden Gloves
Once the bale is conditioned, you need a simple way to create planting pockets and place seedlings or seeds correctly.
This is where a hand trowel and garden gloves become useful.
A hand trowel helps you gently open a space at the top of the bale for seedlings. The bale may still look like straw from the outside, but inside it has begun changing. You want to create enough space for the plant’s root ball without tearing the bale apart.
Garden gloves protect your hands while handling straw, soil, seedlings, and gardening materials.
You do not need heavy tools for this method. One of the benefits of straw bale gardening is that it avoids much of the digging and soil preparation associated with traditional gardening. The Straw Bale Gardens homepage highlights benefits such as no digging, no tilling, fewer weeds, and better drainage.
That is why simple hand tools are enough.
For planting, you may use:
- Hand trowel
- Garden gloves
- Small container of potting mix for seed planting
- Plant labels if you are growing several crops
The trowel and gloves are not complicated products, but they make the planting stage cleaner and easier.
5. Joel Karsten’s Straw Bale Gardens Complete Book
The fifth must-have is not a physical garden tool in the usual sense, but it may be one of the most useful resources for beginners.
Joel’s Straw Bale Gardens Complete book is repeatedly referenced across the Straw Bale Gardens ecosystem as a guide that explains the exact process for conditioning a garden and harvesting vegetables. (Straw Bale Gardens)
This matters because many beginner mistakes happen because people do not understand the full method before they start.
They may buy the right product but still wonder:
When should I begin conditioning?
How long should I wait?
Can I plant yet?
Why is the bale warming up?
What should I do if the bale does not get hot?
What happens after planting?
The education site also points gardeners to StrawBaleGardenClub.com for extra resources, including how-to videos, a community forum, a Bale-Prep Email series, and online events with other straw bale gardeners.
For someone starting for the first time, guidance is part of the toolkit.
A beginner may choose:
- Straw Bale Gardens Complete book
- A BaleBuster starter kit that includes the book
- Garden Club resources for ongoing learning
This is especially helpful if the gardener wants more than a quick product purchase. It helps them understand the process from preparation to planting and maintenance.
Quick Tool Checklist for Beginners
Here is the simple version.
To start a straw bale garden, you need:
| Tool or Product | Why You Need It |
| Straw bales | The container and future growing medium |
| BaleBuster conditioning product | Helps prepare the bale for planting |
| Watering can or hose | Keeps the bale moist during conditioning and growth |
| Hand trowel and gloves | Makes planting easier and cleaner |
| Joel’s book or Garden Club support | Helps you follow the method correctly |
This setup keeps things simple.
You do not need to buy a long list of tools before starting.
You need the right foundation, the right conditioning support, and enough guidance to follow the process correctly.
What You Do Not Need to Start
One of the biggest advantages of straw bale gardening is what it removes from the process.
You do not need to build raised beds.
No need to till the ground.
You do not need perfect soil.
No need for a large backyard.
You do not need a shed full of tools.
The education site describes straw bale gardening as a method that works on patios, driveways, rooftops, and poor soil areas, which makes it especially useful for people who want to grow in places where traditional gardening may be difficult.
That is the point of the method.
It simplifies the growing process by turning the bale itself into the garden bed.
Recommended Product Combinations
Your best product combination depends on your garden size.
For One Bale
Choose BaleBuster1, a watering can, gloves, and a trowel.
This is best if you want to test the method with a small setup.
For a Small Starter Garden
Choose BaleBuster4, a garden hose, gloves, a trowel, and Joel’s book.
This is best for most beginners who want a real starter garden.
For a Larger Garden
Choose BaleBuster20, a hose, gloves, trowel, and strong learning support such as Joel’s book or Garden Club resources.
This is best if you already know you want to prepare many bales.
Common Tool-Buying Mistakes
Buying tools before counting bales
Before buying BaleBuster, decide how many bales you want to condition.
One bale, four bales, and twenty bales require different product sizes.
Skipping the conditioning product
Conditioning is not optional. It is the process that makes the bale ready for planting.
Forgetting water access
Do not place your bales far from water unless you are ready to carry water regularly.
Buying too many unnecessary tools
Straw bale gardening does not require heavy equipment. Start simple.
Skipping the learning step
A product helps prepare the bale, but understanding the method helps prevent mistakes.
Final Recommendation
The top five must-have straw bale gardening tools are simple:
Straw bales, BaleBuster, water access, basic hand tools, and proper guidance.
For most beginners, the best starting setup is:
BaleBuster4 + four straw bales + water source + gloves + hand trowel + Joel’s book or Garden Club support.
That gives you enough to start a practical small garden without overcomplicating the process.
Straw bale gardening works best when the bale is prepared properly before planting. Once the bale is conditioned, the rest of the season becomes easier to manage.
Start with the basics.
Prepare the bale correctly.
Then plant with confidence.
Shop Straw Bale Gardening Products
Before planting season begins, choose the BaleBuster product that matches your garden size.
Start with BaleBuster1 for one bale, BaleBuster4 for a small starter garden, or BaleBuster20 for a larger setup.
Then add the simple tools and learning resources you need to follow the method correctly.