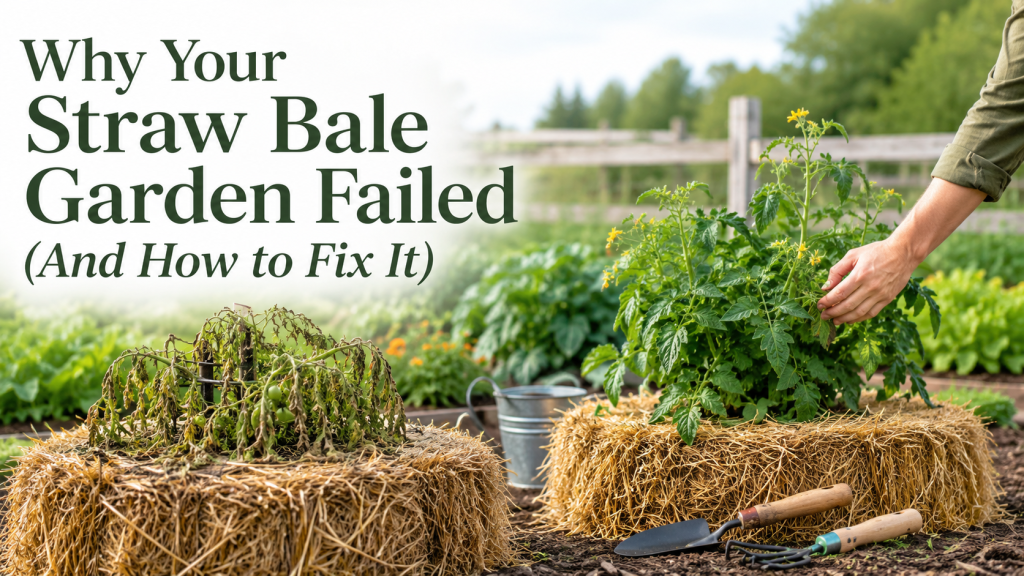
A straw bale garden can fail for several reasons.
Sometimes the bale was planted too early. Sometimes it dried out during conditioning. In other cases, the wrong product size, poor bale placement, weak watering, or cold weather slowed the whole process down.
The good news is that most straw bale garden problems are fixable.
You do not need to give up on the method because one season went badly. You only need to understand what likely went wrong, correct the issue, and prepare your next setup with a clearer plan.
This guide walks through the most common reasons a straw bale garden fails and what you can do differently next time.
Your Bale Was Not Conditioned Long Enough
A fresh straw bale is not ready for planting right away.
It needs time to change inside. During conditioning, water and nutrients help bacteria and fungi begin breaking down the straw. That internal process turns the bale into a better root environment.
When gardeners plant too early, seedlings often struggle. Leaves may yellow, roots may stay weak, and growth may feel slow from the beginning.
The fix is simple: give the bale enough time before planting.
The Straw Bale Gardens guide on bales not getting hot explains that bales can be planted after 12 days of conditioning when temperatures stay above 45°F. It also notes that organic treatment may take 18 days.
Use that timing as a guide, then check the bale itself.
The inside should feel moist, slightly softer, and active. It may warm during conditioning, but it does not need to become extremely hot.
The Bale Dried Out During Conditioning
Microbes need moisture to work.
If the bale dries out during conditioning, the breakdown process slows down. That can leave the straw stiff, dry, and poorly prepared for planting.
A dry bale may look fine from the outside. The problem often hides in the center.
Before planting, open a small area and check deeper inside. The straw should feel damp, not dry. If the center feels dry after watering, the bale needs more consistent moisture.
To fix this, water with a plan.
One bale may only need a watering can. A four-bale garden works better with a hose. Larger gardens need easy water access from the beginning.
Do not place bales far from water unless you want daily watering to become difficult.
The Bale Stayed Too Wet
Water helps the bale condition, but too much water can create problems.
A soaked bale can lose airflow inside. Microbes need moisture, but they also need oxygen. When the bale stays waterlogged, the inside may smell sour or unpleasant.
Plants may also struggle if roots sit in poor, overly wet conditions.
The fix is balance.
Keep the bale moist, not flooded. Water should move into the bale without leaving it constantly soggy. If the bale smells sour, pause heavy watering and allow it to breathe.
A healthy conditioned bale usually smells earthy, not rotten.
You Used the Wrong Product Size
A straw bale garden can fail when the conditioning product does not match the number of bales.
This happens when someone buys a small product and stretches it across too many bales. The result can be uneven conditioning. Some bales may prepare well, while others remain weak and inactive.
Start with your bale count.
For one bale, BaleBuster1 is the one-bale organic option.
Then for a small starter garden, BaleBuster4 is made for four average-size bales.
For larger setups, BaleBuster20 fits twenty-bale gardens.
Do not guess. Count the bales first, then choose the product that matches.
Your Bale Did Not Get Hot
Many gardeners panic when their bales do not get hot.
That does not always mean the garden failed.
Warmth shows microbial activity, but the bale does not need dramatic heat to work. Cool weather can slow bacterial growth, so the bale may only feel slightly warmer than the air.
The Straw Bale Gardens article on bales not getting hot explains that it is not necessary for bales to ever get hot. A warmer-than-air bale can still show bacteria development.
Here is the better way to check:
Does the bale feel moist inside?
Did you complete the conditioning period?
Has the straw softened slightly?
Did you use the right product amount?
Did cold weather slow the process?
When most answers look good, the bale may still be ready.
You Planted Before the Strong Heat Settled
Heat can also cause the opposite problem.
A bale may become too active inside during conditioning. If you plant while the center still feels very hot, young roots can suffer.
Warmth is useful during preparation. Strong heat should calm down before planting.
Check the bale with your hand or a compost thermometer. A gently warm bale can support planting. A very hot bale needs more time.
Waiting a few extra days is better than losing seedlings to a bale that is not ready.
The Bale Was Placed the Wrong Way
Bale position matters more than many beginners realize.
The strings help hold the bale together. When they touch the ground or get cut during planting, the bale may lose structure too early.
The Straw Bale Gardens article on bale placement explains that keeping strings on the sides helps maintain compression. It also notes that compressed bales decompose more quickly during conditioning.
Before watering starts, place the bale where it will stay. Keep the strings around the sides when possible.
Once the bale becomes wet, moving it gets harder.
Your Garden Did Not Get Enough Sun
A straw bale can only do part of the work.
Plants still need sunlight.
If the bale sits in too much shade, vegetables may grow slowly, stretch weakly, or produce less. This can make the method look like the problem when the real issue is location.
Before setting up, watch the garden area during the day.
Choose the sunniest practical spot. Also, think about how trees, fences, walls, or tall plants may create shade later in the season.
A strong bale in the wrong location can still disappoint.
Watering Became Too Difficult
Some gardens fail because the setup makes watering annoying.
At first, carrying water to one bale may feel fine. After planting, that routine can become tiring. Hot weather makes the problem worse.
A multi-bale garden needs an easy watering plan.
Place bales near a hose. Leave walking paths. Make sure you can reach each bale without stepping over plants.
Watering should feel repeatable, not stressful.
The easier the routine, the more consistent you will be.
You Bought Seedlings Too Early
Seedlings should not sit around waiting for the bales.
When gardeners buy plants before conditioning starts, the seedlings may spend too much time in small containers. They can become stressed, root-bound, or weak before planting day.
Buy in the right order.
First, get the bales. Next, choose the right BaleBuster product. Then place and condition the bales. Buy seedlings when planting time gets close.
Seeds can wait longer, but live plants need better timing.
The Bale Looked Moldy
Mold can scare beginners, but it does not always mean the garden has failed.
Straw bales break down through biological activity. Some visible fungal growth can appear during that process.
The Straw Bale Gardens article on mold addresses mold as part of the wider bale gardening process.
Still, watch the difference between normal biological activity and a sour, waterlogged mess. A little surface growth during decomposition may not be a major issue. A bale that smells rotten and stays soaked needs better airflow and less water.
Use smell, moisture, and plant health together when judging the bale.
You Used Loose or Poor-Quality Bales
Not every bale starts with the same quality.
Loose bales can break apart too early. Wet or spoiled bales may create problems before you even begin. Poorly tied bales can lose structure during watering and planting.
Choose bales that feel firm, dry, and tightly tied.
A good bale should hold its shape during conditioning. It will soften later, but it should not fall apart from the beginning.
When buying locally, inspect the bale before you bring it home.
You Treated Every Crop the Same
Different plants behave differently in straw bales.
Tomatoes, cucumbers, peppers, herbs, greens, and flowers do not all need the same support or space. Some crops grow tall and heavy. Others stay compact.
A garden can fail when plants overcrowd the bale or compete for support.
Plan before planting.
Give tall crops cages or trellises. Keep sprawling plants where they have room. Place herbs and greens where you can harvest easily.
A good layout helps plants grow better and makes the garden easier to manage.
You Skipped Learning the Method
Straw bale gardening is simple, but it still follows a process.
Many failures come from mixing random advice, skipping conditioning steps, or guessing product amounts.
If this is your first serious season, use a guide.
The BaleBuster4 Starter Kit combines BaleBuster4 with Straw Bale Gardens Complete. That makes it useful for beginners who want the product and the full method together.
A guide can help you avoid the small mistakes that turn into a poor season.
How to Fix a Failing Straw Bale Garden Mid-Season
Some problems can still improve during the season.
Start by checking moisture.
If the bale feels dry inside, water more deeply and consistently. Avoid quick surface watering that never reaches the center.
Next, look at plant color.
Yellowing leaves may point to nutrient stress, poor root conditions, or watering issues. Check whether the bale was conditioned properly and whether roots have a moist, workable space.
After that, review sunlight.
Plants in heavy shade may not recover fully without more light. If containers or nearby objects block the sun, move what you can.
Finally, support weak plants.
Add stakes, cages, or ties before stems bend too far. Remove dead leaves and give the plant better airflow.
You may not save every crop, but you can often improve the garden.
How to Prevent Failure Next Season
A better season starts before planting day.
Decide your bale count early. Buy firm straw bales. Place them near water and sunlight. Choose the right BaleBuster product. Condition before planting. Wait until the bale shows signs of readiness.
For one bale, choose BaleBuster1.
Then for four bales, choose BaleBuster4.
For twenty bales, choose BaleBuster20.
If you want extra guidance, use the BaleBuster4 Starter Kit.
This plan gives the garden a stronger foundation before the first seedling goes in.
Quick Troubleshooting Checklist
Use this checklist if your straw bale garden is struggling:
- Did you condition the bale long enough?
- Did the bale dry out during conditioning?
- Does the center feel moist?
- Did the bale stay too wet?
- Did you use the right BaleBuster size?
- Did cold weather slow the process?
- Is the bale in enough sun?
- Are the strings still holding the bale together?
- Did you plant before the strongest heat settled?
- Do tall crops need support?
- Did you buy seedlings too early?
A few honest answers can reveal the problem quickly.
FAQs
Why did my straw bale garden fail?
Most failures come from poor conditioning, inconsistent watering, planting too early, weak sunlight, wrong product size, or poor bale placement.
Can I fix a straw bale garden after planting?
Sometimes. Check moisture, sunlight, plant support, and bale condition first. Correct what you can and give the plants time to respond.
Does my bale need to get hot?
Not always. Warmth helps show microbial activity, but a bale does not need extreme heat to work.
Why are my plants turning yellow?
Yellow leaves can come from poor conditioning, weak roots, watering issues, or nutrient stress. Start by checking whether the bale is moist and properly prepared.
Which BaleBuster product should I use next time?
Use BaleBuster1 for one bale, BaleBuster4 for four bales, and BaleBuster20 for twenty bales.
Final Thoughts
A failed straw bale garden does not mean the method does not work.
It usually means one part of the setup broke down.
Maybe the bale was planted too soon. Maybe it dried out. Perhaps the wrong product size caused weak conditioning. In some cases, shade, poor watering, or loose bales created the problem.
Once you find the cause, the fix becomes clearer.
Prepare the bale properly. Match the product to your bale count. Keep water close. Place the garden in good sun. Wait until the bale is ready before planting.
A better straw bale garden starts with a better setup.