
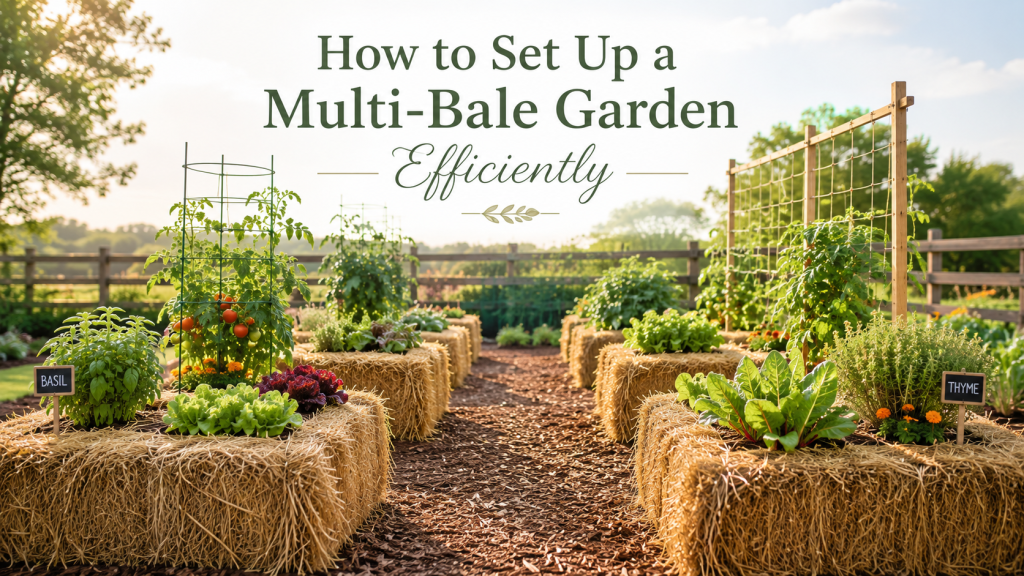
A multi-bale straw bale garden gives you more growing room, more crop variety, and a better chance to build a productive seasonal garden.
But once you move beyond one or two bales, the setup needs more thought.
A single bale can be placed almost anywhere sunny and watered by hand. A multi-bale garden is different. You need to think about layout, watering access, walking space, plant support, conditioning timing, and which BaleBuster product matches your bale count.
The goal is not just to set out several bales.
The goal is to create a garden that is easy to condition, easy to plant, easy to water, and easy to harvest from.
This guide walks through how to set up a multi-bale garden efficiently, so you can avoid the usual beginner problems and make the growing season smoother from the start.
Start by Deciding How Many Bales You Actually Need
Before you buy anything, decide how many bales you want to prepare.
This is the first decision because it affects the entire setup. Your bale count determines how much space you need, which BaleBuster product to buy, how much watering you will do, and how many plants you can realistically manage.
For many gardeners, four bales is a strong starting point. It gives you enough room to grow a useful mix of vegetables, herbs, or flowers without becoming difficult to maintain.
If you are preparing four bales, BaleBuster4 is the direct match because it is made for conditioning four average-size bales.
If you are planning a larger twenty-bale setup, BaleBuster20 is the better fit because it is the twenty-bale option listed for larger gardens.
If you are only testing one bale before expanding, BaleBuster1 is the one-bale organic option.
The simplest way to avoid buying mistakes is to count your bales first, then buy the product that matches that number.
Choose a Layout Before Moving the Bales
Once straw bales are wet and conditioning, they become much harder to move.
That is why the layout should be planned before the bales are placed.
For a multi-bale garden, avoid pushing all the bales tightly together unless you are sure you can still reach every plant. You need room to walk, water, inspect plants, harvest, and add support where needed.
A few simple layout options work well:
Straight Row Layout
This is the easiest option for beginners.
Place the bales in a straight line with enough room to walk along one or both sides.
This layout works well if you have a narrow side yard, fence line, driveway edge, or long garden strip.
Two-Row Layout
This works well for four to eight bales.
Place bales in two rows with a walking path between them. This makes watering and harvesting easier because you can reach both sides.
U-Shaped Layout
A U-shaped layout is useful if you want the garden to feel like a dedicated growing area.
It creates a central working space where you can stand, water, prune, and harvest.
Block Layout
This can work for larger gardens, but only if you leave enough access paths.
Do not create a block so wide that you cannot reach the middle bales.
Efficiency is not about packing in as many bales as possible. It is about making the garden easy to manage all season.
Place the Garden Near Water
Water access is one of the biggest factors in whether a multi-bale garden stays manageable.
One bale can be watered with a can. Four bales can still be handled by hand if needed. Twenty bales require a better plan.
Before you place your bales, ask:
- Can the hose reach every bale?
- Will I need a watering can every day?
- Can I water without stepping over plants?
- Can another person easily water the garden if needed?
- Will this setup still be convenient in hot weather?
If the watering process is inconvenient at the beginning, it will become more frustrating as the plants grow.
A multi-bale garden should be positioned where watering is simple and repeatable. That matters during conditioning, and it matters even more during the growing season.
Keep Sunlight and Plant Height in Mind
Most vegetable gardens need strong sunlight, so choose the sunniest practical location available.
But with a multi-bale garden, you also need to think about plant height.
Tall crops like tomatoes or climbing cucumbers should not shade smaller crops if you can avoid it. If the garden has a north-south orientation, plan your taller crops carefully so lower plants still receive enough light.
A simple approach is:
- Put tall crops toward the back or north side of the garden.
- Keep leafy greens, herbs, and smaller crops where they will not be shaded.
- Leave room for stakes, cages, or trellises before plants get large.
The best layout is one that still works after the plants are mature, not just when the bales are empty.
Group Bales by Crop Type
When setting up several bales, it helps to group similar crops together.
This makes watering, support, and harvesting easier.
For example:
- Put tomatoes together.
- Put peppers together.
- Put herbs in a separate bale or section.
- Put climbing crops near a trellis or fence.
- Put leafy greens where they are easy to harvest.
This kind of grouping keeps the garden organized.
It also helps if some crops need more support than others. Tomatoes and cucumbers may need stronger structures. Herbs and greens are usually simpler to manage.
A multi-bale garden becomes much easier when every bale has a clear job.
Condition All Bales on the Same Schedule
For efficiency, condition the whole garden together.
If you are using several bales, do not condition one bale this week, three bales next week, and the rest later unless you have a specific reason. Staggering can make planting and watering more confusing.
A cleaner method is to place all the bales first, then begin the conditioning process across the full garden at the same time.
The Straw Bale Gardens method explains that once the straw inside the bale begins to decay, it becomes conditioned compost and creates a strong rooting environment. That preparation is an essential part of the method, which is why it is better to treat conditioning as a planned stage rather than a last-minute task.
For four bales, BaleBuster4 keeps the process simple because it is made for four average-size bales.
For twenty bales, BaleBuster20 is more efficient because it is sized for a larger setup.
If you are new and want the product plus the full method in one purchase, the BaleBuster4 Starter Kit includes BaleBuster4 and Straw Bale Gardens Complete.
Build Access Paths into the Garden
A multi-bale garden needs paths.
This is easy to forget when the bales are empty, but once plants begin growing, the garden becomes much fuller.
Leave enough room for:
- Watering
- Harvesting
- Pruning
- Checking plant health
- Adding supports
- Removing weeds or debris
- Moving tools through the area
A narrow garden may only need one main path. A larger garden may need several paths so you can reach every bale without stepping over plants.
Good access also helps prevent damage. If you have to lean across plants every time you water or harvest, stems may break and the garden becomes harder to maintain.
A simple rule: if you cannot comfortably reach a bale, the layout needs more space.
Set Up Supports Early
If you plan to grow climbing or heavy crops, do not wait until the plants are already leaning.
Install supports early.
Tomatoes, cucumbers, pole beans, and other taller crops may need cages, stakes, trellises, or string support. It is easier to add these before the plants become large.
In a multi-bale setup, supports should be planned as part of the layout.
For example, if you are using a fence or trellis, place climbing crops near that side from the beginning. If you are using tomato cages, make sure each bale has enough space around it.
Do not crowd support-heavy crops together unless you have planned for airflow and access.
Avoid Mixing Too Many Experiments in One Setup
A multi-bale garden gives you room to try different crops, but too many experiments can make the garden harder to manage.
If this is your first multi-bale setup, keep it simple.
Choose a few crops you actually want to grow and organize the bales around them.
A beginner-friendly four-bale layout might look like this:
- Bale 1: tomatoes
- Bale 2: peppers
- Bale 3: herbs
- Bale 4: greens or flowers
A larger garden can have more variety, but the principle stays the same: keep the layout understandable.
You should be able to look at the garden and know what each section is for.
Label Each Bale
This sounds small, but it helps.
When several bales are planted, it is easy to forget what went where, especially in the early stages before plants mature.
Use simple labels to mark:
- Crop name
- Planting date
- Variety, if needed
- Any special note
This is especially helpful if you are comparing crops, trying a new variety, or planning to repeat the garden next year.
At the end of the season, these notes can help you remember what worked best.
Prepare Tools Before Planting Week
The best time to prepare tools is before you need them.
For a multi-bale garden, keep the basic tools close:
- Hose or watering can
- Gloves
- Hand trowel
- Pruning shears
- Plant labels
- Stakes or cages
- Garden twine or clips, if needed
You do not need a complicated tool collection. Straw bale gardening removes much of the digging and soil preparation associated with traditional garden beds.
But you do need tools that help you water, plant, support, and maintain the garden.
Create a Simple Maintenance Routine
A multi-bale garden becomes easier when you have a routine.
You do not need to overmanage it, but you should check the garden regularly.
A simple weekly routine might include:
- Check moisture levels.
- Look for plants that need support.
- Remove dead or damaged leaves.
- Check for pests.
- Harvest mature crops.
- Note any bale that dries faster than the others.
- Adjust watering if weather changes.
The advantage of a multi-bale garden is that it can produce more, but it also gives you more to observe.
A routine helps you catch small problems before they become bigger.
Product Path for Multi-Bale Gardeners
The right product depends on the size of the setup.
If you are creating your first four-bale garden, start with BaleBuster4.
If you want the four-bale product plus step-by-step guidance, choose the BaleBuster4 Starter Kit.
If your setup is closer to twenty bales, choose BaleBuster20.
If you only want to test one bale before building a larger layout, begin with BaleBuster1.
If you want to learn the method before setting up several bales, start with the main education resources on Straw Bale Gardens or use the book included in the starter kit.
Common Multi-Bale Setup Mistakes
Placing bales too close together
This makes watering, pruning, and harvesting difficult later.
Forgetting water access
A garden that is hard to water becomes hard to maintain.
Buying the wrong product size
Always match BaleBuster to your bale count.
Planting tall crops where they shade everything else
Think about mature plant height before planting.
Skipping supports until plants are already too large
Set up stakes, cages, or trellises early.
Trying to grow too many crop types at once
Keep the first multi-bale setup simple and organized.
A Practical Multi-Bale Setup Example
For a beginner-friendly four-bale garden, use a two-row layout.
Place two bales in the front and two in the back, with a walking path around the outside and enough space between rows to water comfortably.
Use BaleBuster4 to condition the four bales.
Then plant based on height and access:
- Back row: tomatoes and cucumbers with support
- Front row: herbs, peppers, greens, or flowers
This keeps the taller plants from blocking access to the smaller crops. It also makes watering easier because all four bales are grouped together but still reachable.
For larger gardens, repeat this kind of small unit rather than creating one crowded block.
Think in sections.
Four bales here. Four bales there. Paths between them.
That makes a larger garden feel organized instead of overwhelming.
Conclusion
Setting up a multi-bale garden efficiently is mostly about planning before the bales are conditioned.
Count the bales first.
Choose the right BaleBuster product.
Place the garden near water.
Leave space for walking and harvesting.
Group crops by type.
Install supports early.
Condition the bales on the same schedule.
A multi-bale garden should feel organized, not crowded. When the layout is clear and the products match the garden size, the growing season becomes much easier to manage.
Whether you are starting with four bales or preparing a larger setup, the best results begin before planting day.
Plan the layout.
Prepare the bales.
Then grow with confidence.